

Google Maps has become an unavoidable part of our life. From finding your way to explore new places it can do all. Using it on our website can help us to give someone our address, find some places, or calculate the distance in seconds. Google Maps also provides an Embedding feature which can help you to show a small location but if you need to add features of google maps and build your web app on top of it. Then you would be needing Google Maps API support.
What are we going to build?
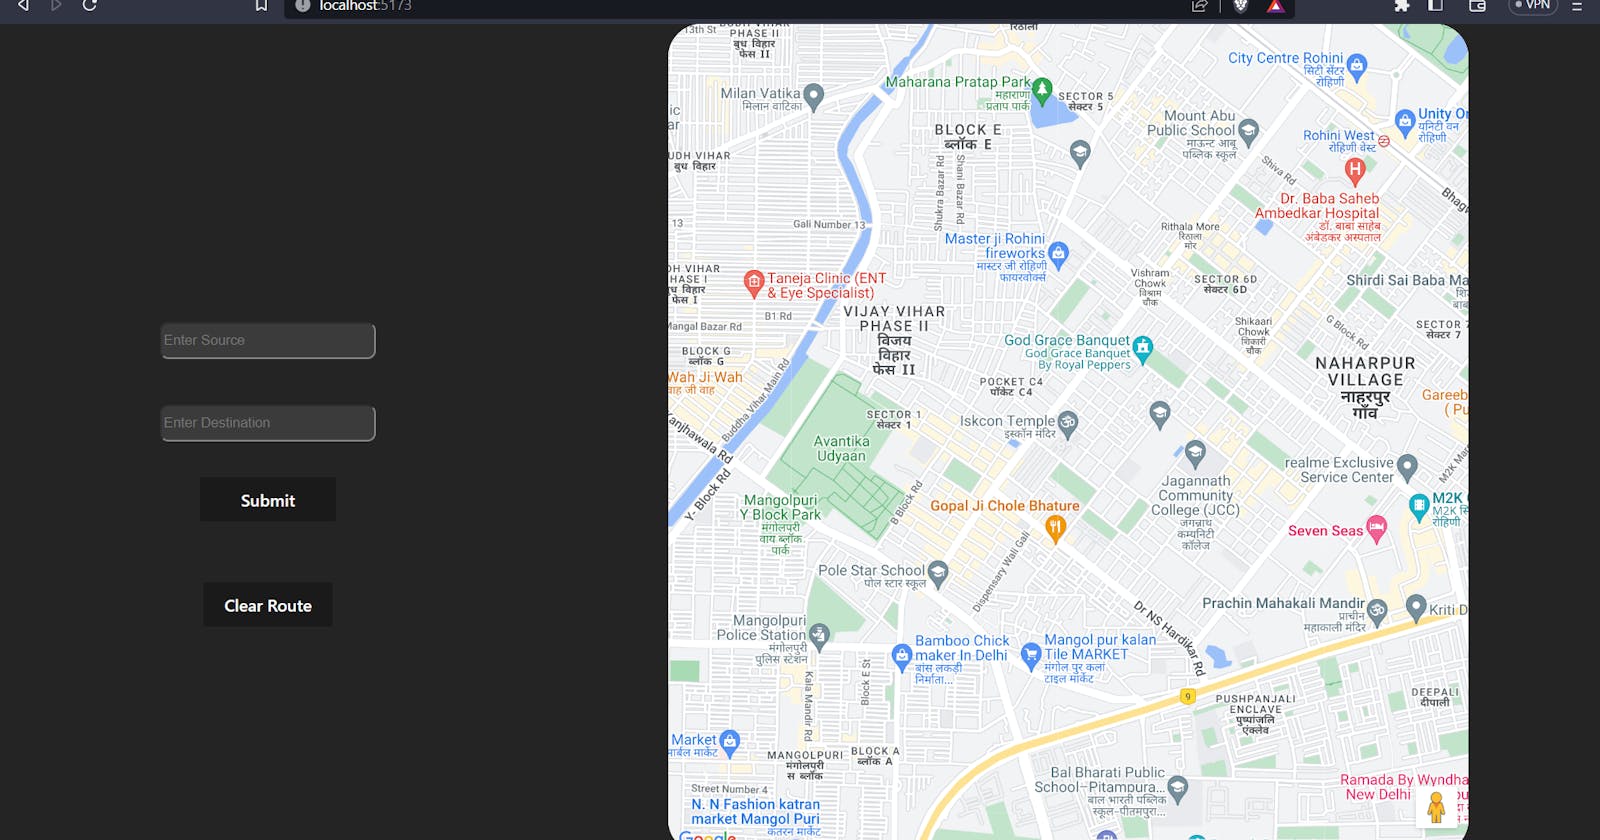
We are going to build a simple Google Map Section and a form to select the Destination and Origin of the location. We will integrate the routing functionality to show us the routes between two places and also an autosuggestion input field which will generate suggestions of locations based on our search.
You can watch the video for further details and I will take you through the code part in a later section.
Setup Vite + React Project
If you wanted to set up the project locally follow the below steps. We are using this GitHub repo for further learning of the tutorial. You should know basic react and that's it for following along with this tutorial
git clone https://github.com/mecskyverse/vite-maps-tutorial
Setting up Google Cloud Platform for an api key
I would say this can be the toughest part of this tutorial if you are a resident of India. Due to RBI regularities connecting accounts can be cumbersome sometimes but I will show you how you can create an API key. Also, Google Maps API is free to use it gives you $300 credits which can easily be enough for your project.
Open the Google Cloud Platform and create or link your Google account to this platform.
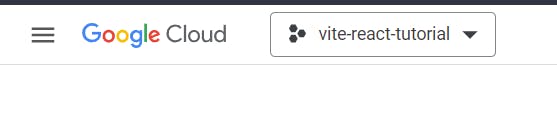
Now Click on Console in the top right corner
In the Top Left corner you will get Navigation Menu, Home Button and a project selection tab.
As per RBI Guidelines, google cloud needs to access your debit or credit card for payments but as I say you will get a free $300 credit. So, it is just a formality for Cloud to get your card details. Now, mainly google cloud platform provides you with two services Google Vms and Google Apis, and for both types of services, we have to link our different cards.
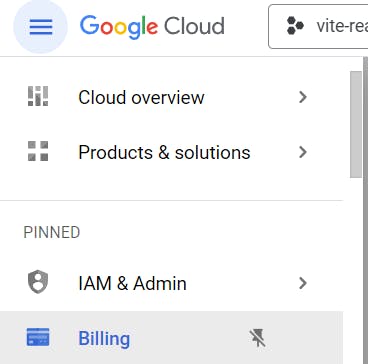
- For our purpose of google maps api go to > Navigation Menu and then select > Billing > Create Account > Select your Country and Add name to the account.
In the last dropdown menu select Google Maps Platform. Your form will look like this
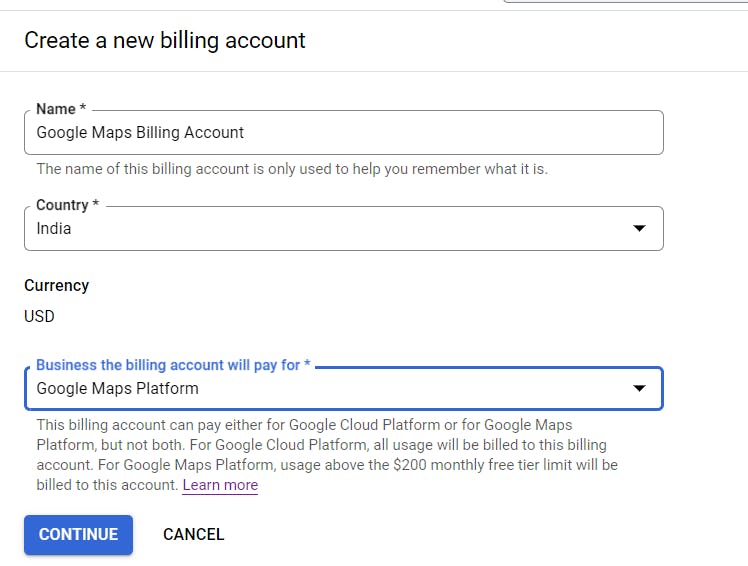
Enter Your basic details and add a card preferably Visa or MasterCard and your billing account will be created. If you already have your card linked to the Google Cloud platform then it will not work you have to delete that card from the google cloud platform billing account or add a new card. It took me a whole day to resolve this problem.
If you can successfully submit and verify your card then congrats next steps will be much easier.
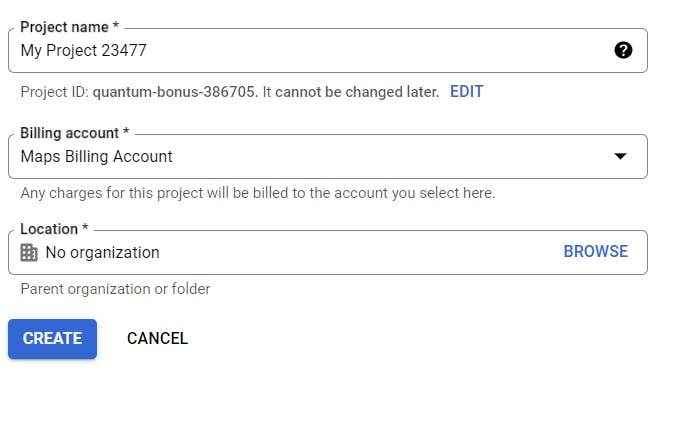
Click on the project selection tab in the top left corner and create a new project > Enter the project name you wanted and select the billing account which you have created for google maps.
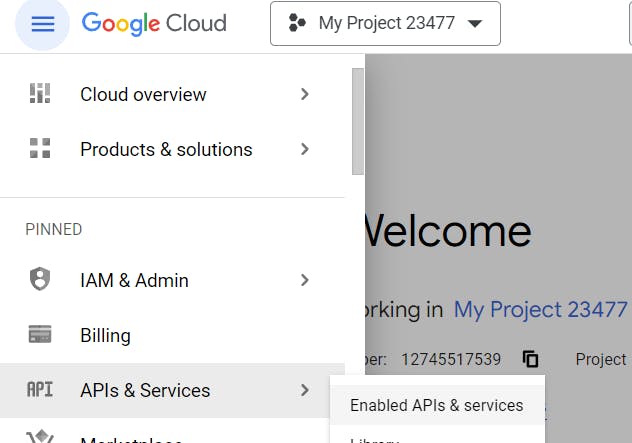
Select your newly build project from the project selection tab and go to API services > Enabled Api & services from the navigation menu.
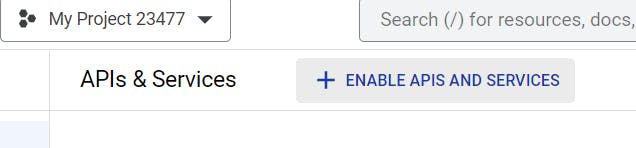
Click on Enable APIs and Services > select Maps Javascript API > Enable
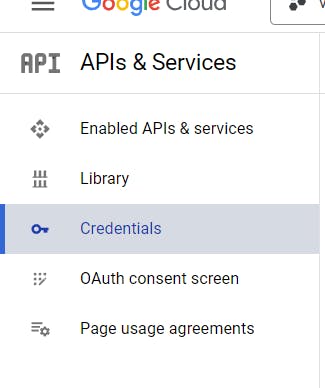
This will enable your API> Go back to Enabled APIs & services > Select Credentials
Generate your API key and copy it. Now, your work with Google Cloud Platform is ended. Now I will take you through the code part of this project.
Steps to setup locally
we are using the npm package manager you can use yarn and make sure you have node.js installed. I am using NPM version 9.5.1 and Node version 16.14.2 I hope you will not face any problems with your version but in any case, you can use these versions.
git clone https://github.com/mecskyverse/vite-maps-tutorial.git
cd vite-maps-tutorial
npm i
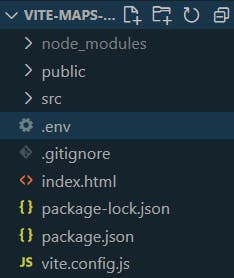
This will install all the dependencies you need. Now rename the .env.sample file to the .env file and make sure this file is present in the root directory. Your folder will look like this.
Open .env and paste your API key into it. In your terminal type the below command and go to localhost:5173. You can see your project
npm run dev
Understanding the Code

Firstly we are importing some hooks from React and then
useJsApiLoader: to load our google maps through our API in js
GoogleMap: If we want to show Google Maps on our site we will import this component.
Marker: The component is used to mark certain locations on the Map.
AutoComplete: We will wrap our input field in this component so that we can get suggestions for the location we are trying to access.
DirectionsRenderer: This component will help us to generate a path between two locations.
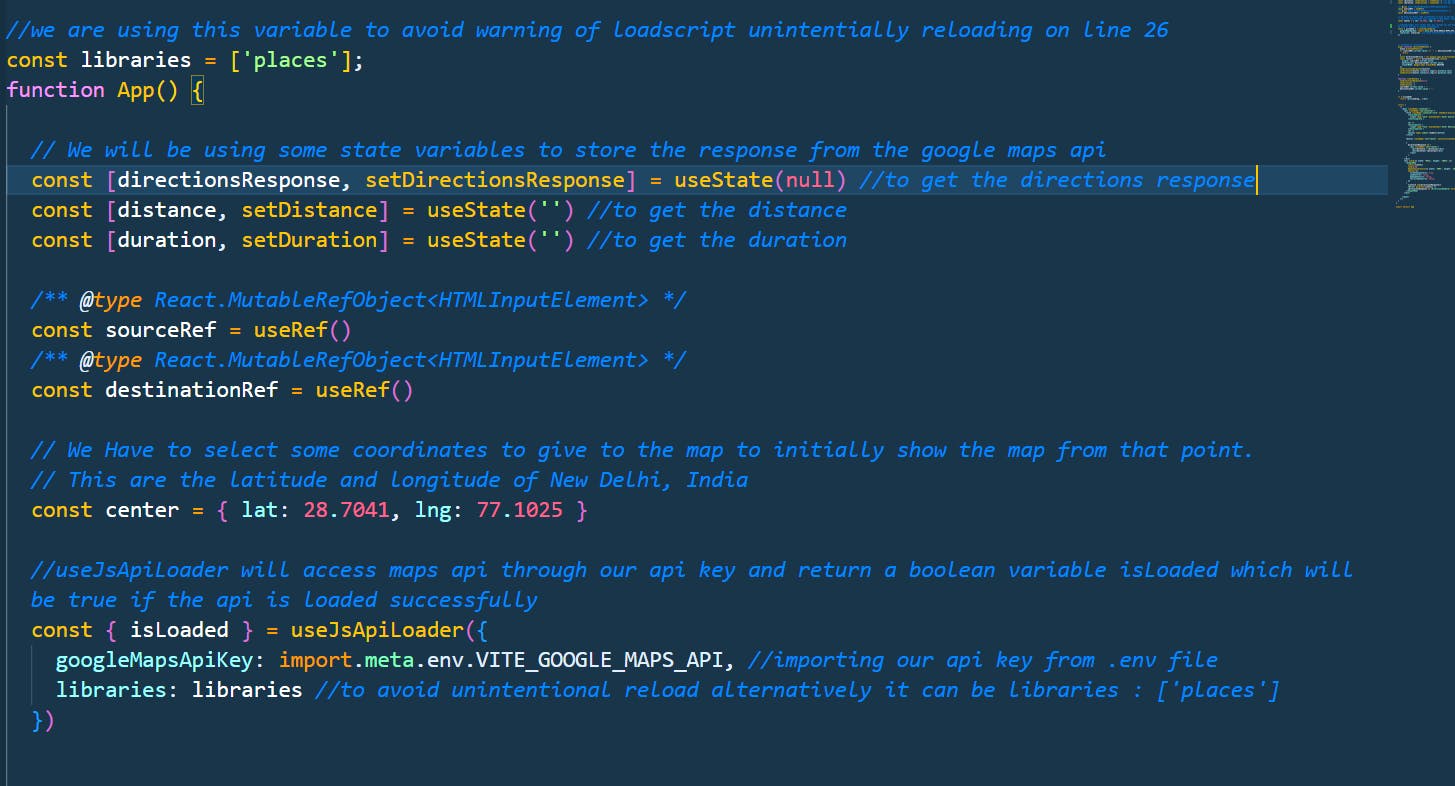
Here we are making our functional component and using some state variables to record We also see that we are using the useRef hook to create references to the input fields for the source and destination:
We will be using these references to read the values entered by the user and to clear the input fields.
We are also using the useJsApiLoader hook to access the Google Maps API through our API key, which is stored in the .env file.
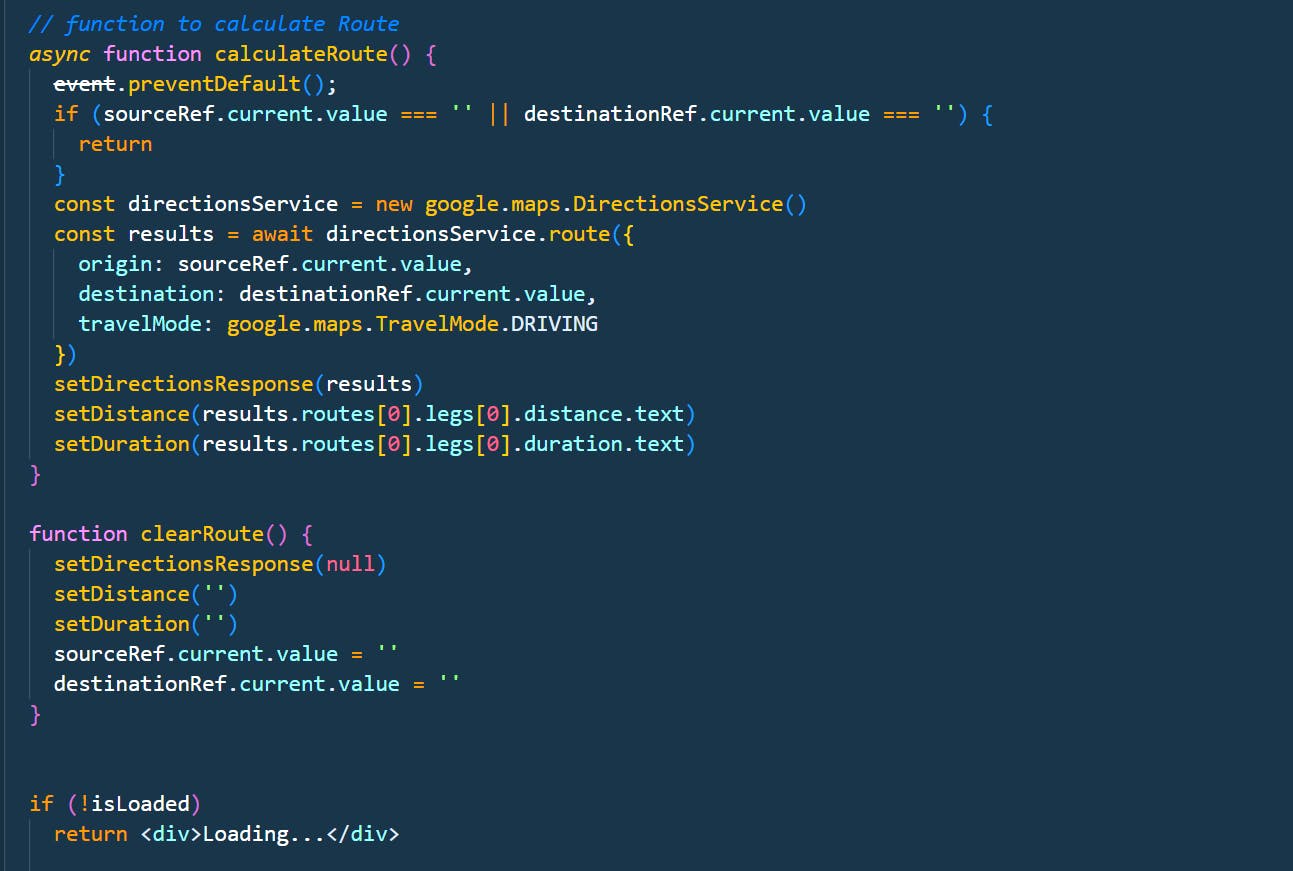
calculateRoute: This function is called when the user submits the source and destination input fields. It first checks if both fields are non-empty, and if so, it creates a new DirectionsService object, which is used to calculate the route between the source and destination.
results object contains information about the calculated route, including the distance and duration of the route. The calculateRoute function then uses the setDirectionsResponse, setDistance, and setDuration functions to update the state variables with the calculated route information.
clearRoute: This function is called when the user clicks the "Clear Route" button. It simply resets the state variables to their initial values.
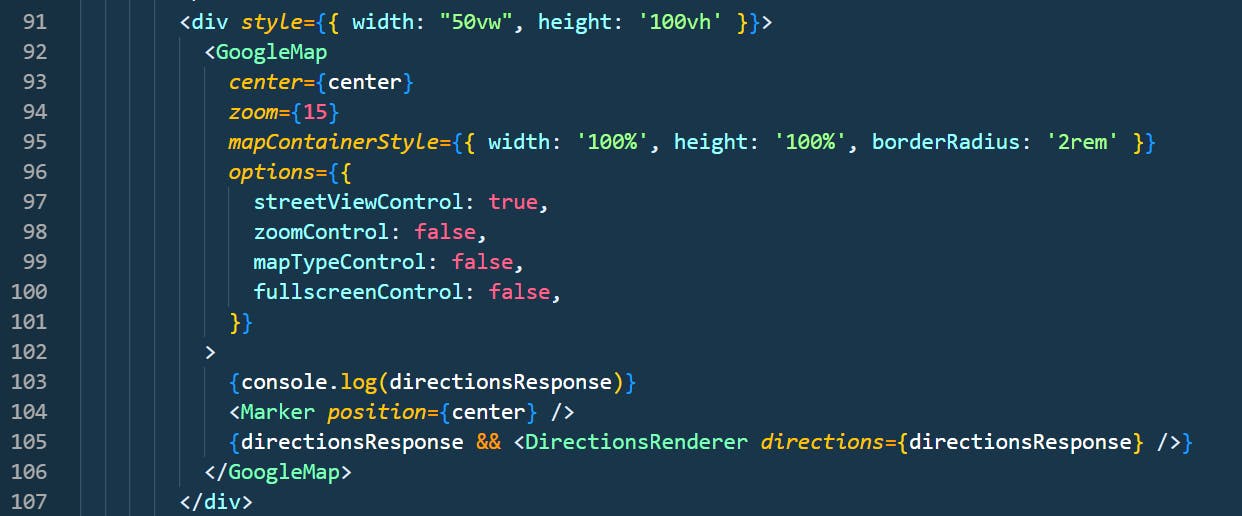
The GoogleMap component takes in various props to configure the map. The center prop specifies the initial center coordinates for the map. In this case, it is set to center which is an object with latitude and longitude values for New Delhi, India.
The zoom prop specifies the initial zoom level of the map. Here, it is set to 15.
A mapContainerStyle prop is an object that specifies the CSS styles for the container of the map.
The options prop is an object that specifies various options for the map, such as whether to show the street view control, zoom control, etc.
Inside the GoogleMap component, there are two child components.
The first child component is a Marker component. It renders a marker at the center coordinates of the map. In this case, it is set to center.
The DirectionsRenderer component renders the route between the source and destination locations on the map, based on the response received from the Google Maps API
Conclusion
In conclusion, integrating Google Maps API with Vite React is a straightforward process that can add a lot of value to your applications
If you have any questions or comments, please feel free to reach out to me on Twitter at @mecskyverse. I'm always happy to help and discuss web development!